We've managed to buy this Sherco for £800... it looks clean & tidy but lacks a bit of TLC, so now that I have the parts here, I thought I'd run through a few of the things that seem to be common faults on these bikes as well as the service side of things...
This bike is a Cumbrian bike from new, bought by a guy on a farm near Tebay from Birkett Motosport in Broughton in Furness. (They don't seem to stock Sherco's anymore it seems).

It was used by the first owner for a few years, then sold to the next door neighbour about 2 years ago, a young lad, who clearly just rode it & now we have it to play with...
Things it's needed since we picked it up are:
New chain & sprockets - The standard is 42/10, with a 520 102 link chain, so I'll stick with that for now, although I've read a little about the ratio's & it appears that you can use the following:
I've ordered the chain & sprockets from Ecosse MX who have an Ebay shop, they were £57.99 + £7.99 postage... not used either the company or these chain & sprockets before so we'll see how they go...

08/01/15: The new chain arrived today, so I've now fitted it. The front sprocket requires the plastic engine casing & the gear lever to be taken off to access the spring clip that holds it in place.
There was loads of mud/grass trapped behind the sprocket too which was slowly eroding the rubber bush that protects the spline where it enters the gearbox, so after cleaning all this out & the grooves on the spline, I added some Copperslip to add a layer of protection & cushioning then popped the new sprocket on.
Once all the parts & undercarriage had been cleaned I slid the new chain through the runners & laid it on the swingarm whilst I fitted the rear sprocket to the rear wheel hub. This has 4 bolts, which are allen bolts at the front with 13mm nuts on the back, I replaced the thread lock on as I refitted them & also put a thin layer of copperslip between the sprocket & the hub to protect the alloy from corrosion.
The chain I'd received was a gold 520 RK chain with what I thought was 102 links, but it was 8 links too long so I removed the odd ones & popped the split link into the gap, the chain is on adjuster no.4 at the back wheel which is a tad too long but hey, it all looks very shiny & now runs very smoothly, so that's that job ticked off now too!
Gear Oil: The Sherco's share the same problem as the Beta apparently, the plates stick together until the bike is warm & has been ridden a bit, (Apparently the best ways to clear them is to start the bike in neutral, let it run until it is properly warm, then whack it in 5th gear with the front wheel against a wall & the front brake on, this is the extreme method, if the bike is used regularly, then it's not such a problem & riding it whilst dabbing the back brake can also clear it.
We had a hilarious moment when we started the bike the first time here, it was in the workshop & just jumped forward, the clutch did nowt & the back wheel just kept spinning, so we chucked a rag in the chain to jam it up as neither of us could find the cut off switch!! Proper muppet moment... ;-)
Recommendations say use Light Gear Oil, either Putoline, Maxima or Rock Oil, (450cc 75w synthetic too), but to my thinking I have a feeling that the modern gear oils are too sticky for these boxes, so a mineral oil or Semi Synthetic Auto Transmission Fluid, (85w ATF), might reduce the sticky problem... time will tell, for now I've stuck to the standard recommendation in the manual when I changed the oil.

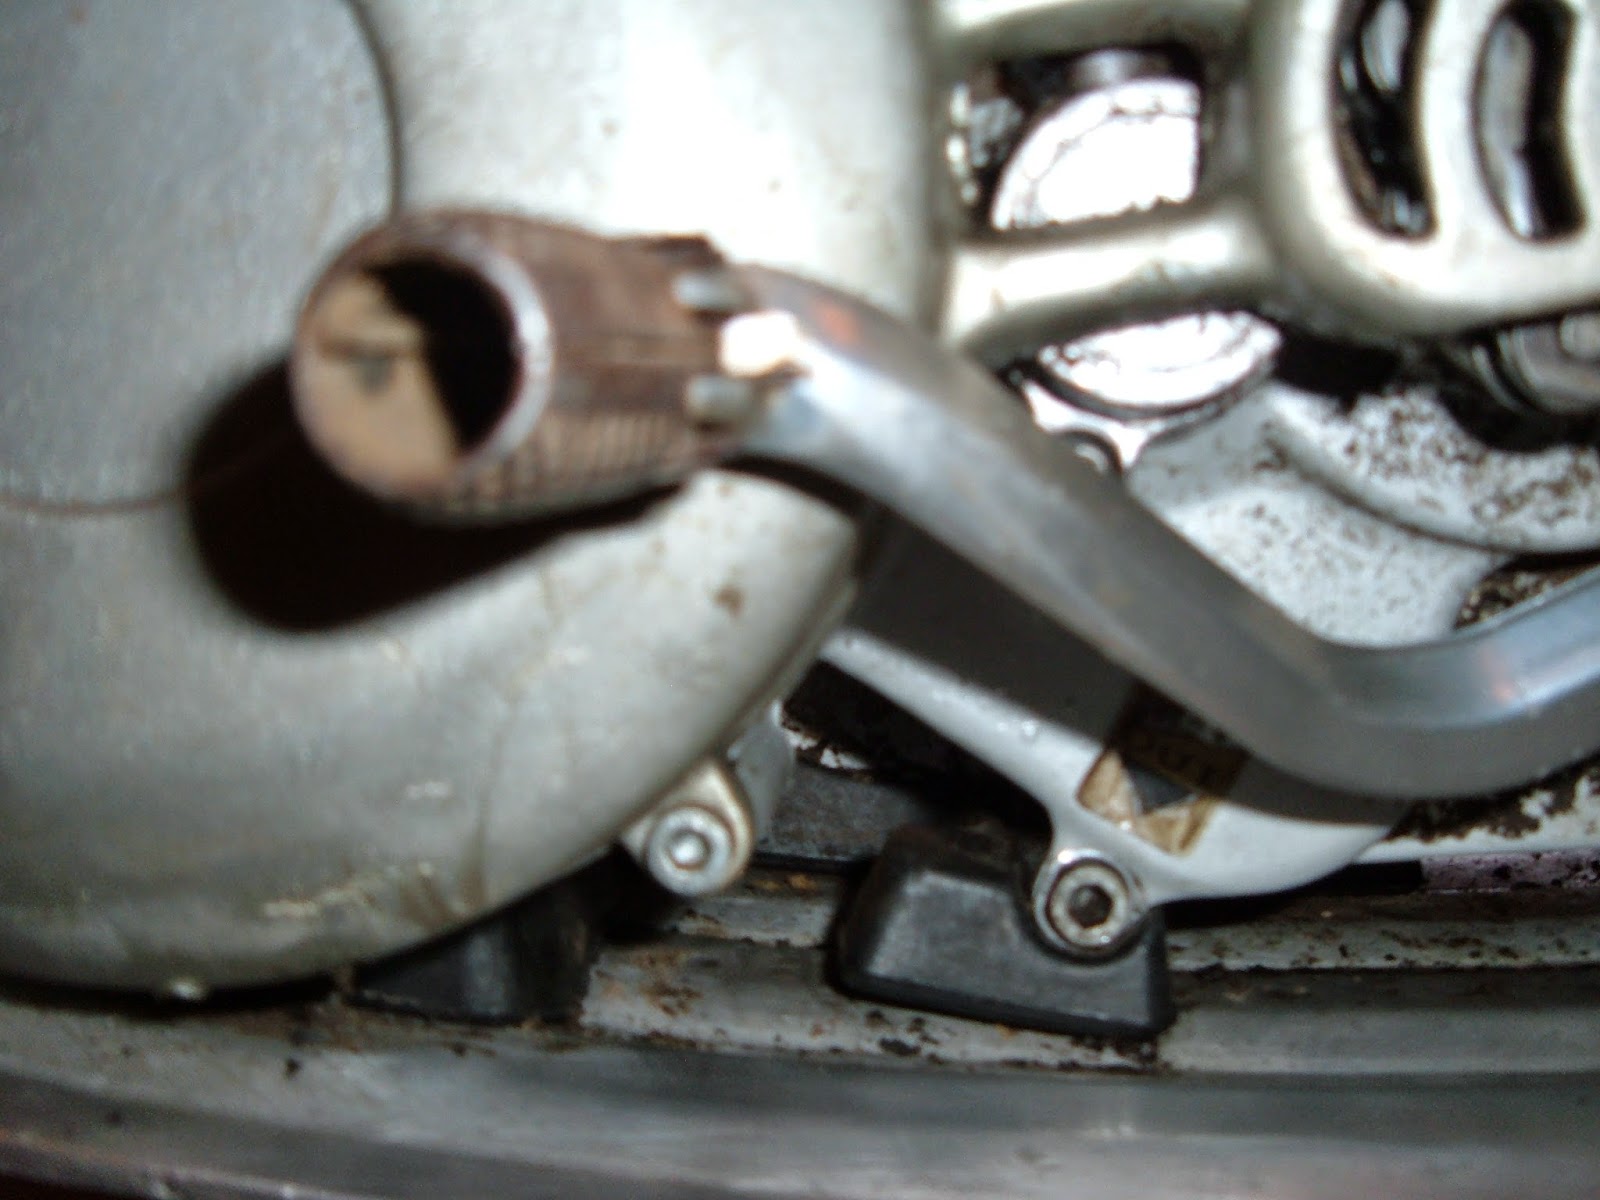
The drain plug is under the gear lever, so on the left side of the engine, the refill plug is just below the exhaust on the right side of the engine block, (See pics below). You have to remove the bash plate to get it to drain cleanly.


We used a small funnel & laid the Sherco on it's side to fill it up, 450cc/ml of oil. It's a tiny hole & fills slowly so also spits back quickly, have a rag nearby to mop it up!!
Bleed the Clutch: I'd bled the clutch when I first got the bike to try to sort what I thought at the time was the problem with the gears, since then I've found a few other things that it has turned out to be...
1. The cap on the master cylinder is plastic & was cracked, so I swapped it with the brake one to test it out, it worked fine at the time, but then the next time I started the bike, I had the same problem, no clutch... I traced it through today after finding the reservoir empty of fluid, puzzling, but obvious when I refilled it & checked the banjo bolt above the chain, it had no washer on it so was seeping a tiny bubble of fluid when you pulled the lever & drained the cylinder when it stood for a day or so.
Because there was a load of mud & grass trapped behind the chain guard, this soaked it up & left no visible trace of the leak. So cleaned the crap out, re-bled the line after adding two new copper washers to the banjo bolt. I'll leave it overnight now & check the reservoir again tomorrow.
New caps are coming for the master cylinders, (£14.99 from the Splat Shop), only the plastic ones, but at some point I'll pop on two blue Apico ones to ensure a better fit & a bit of bling to the bike!

Leaky Petrol Tank: The tank on these bikes is made from some kind of polythene. The problems with this stuff seems to be that
A: It expands when it interacts with petrol & all of the additives in it,
B: The petcock has 2 brass threads in it which can pull out if they are over tightened.
A lot of these type of bikes have aluminium tanks, which is a bit heavier but more robust, it also has a good setup for attaching the petcock securely to the tank. I can only guess that this was a design idea that ran for a few years & has now been ditched as the newer Sherco's have an ally tank.
NB: These tanks ran from 2002 - 2005, same shape - available at the Splatt Shop for around £165.

The lad who owned this before me had made some effort to seal the petcock with standard black silicone sealant, it worked for about a day, then totally pee'd fuel everywhere... not ideal... I made a bodge repair after cleaning all the silicone off the tank that Lucy's dad had suggested, basically inner tube rubber patches with petroleum jelly between them, it worked for two days then the fuel pee'd everywhere again...

Gaz suggested we try something else & had a tube of Land Rover flexible gasket which is used for head gaskets on old Land Rovers

So I took off the foam & inner tube version I'd made, cleaned the tank again & applied more inner tube patches, 3 layers, sandwiching layers of the gasket in between... It was a pain in the arse to put back on as you have to stretch the inner tube rubber over the bolts & the petcock filter, but it eventually went on... phew..
I left it in the van to set overnight in the cold winter air & shrink the tank ready to pop it back into the bike the next morning.
Before putting it all back together I tested it with a full tank of fuel, it didn't leak, so back into the bike it all went, being especially careful to not jar the petcock, not an easy task... 10 days later it hasn't leaked a drop of fuel, it'll get a proper test when I actually take the bike out to ride it next week, but fingers crossed this might be the solution?? Update: 31/12/2015 this repair is still holding!
Coolant: To change the coolant is a bit of a fiddly pig, the tank has to come off, then you take out the 4 wires that go into the coil before trying to loosen the radiator cap, which is tucked under the head stock very neatly. Once this is removed, then drain the radiator, (drain plug is on the right side of the engine, below the water pump, Silver bit on the right in the picture below)
The mix is 50/50 water/coolant, fill the radiator up until the fluid just covers the fins in the top of the rad, (roughly 500ml), this then leaves an expansion chamber, you'll need a torch to see it & a funnel!! The drained fluid was almost clear, so it either hadn't been done in awhile or the level of coolant was minimal to say the least, so this should help it run a bit nicer now.
Pop it all back together & tighten the radiator cap with a screwdriver against the vertical ridges. Leave the fuel tank empty & somewhere cold overnight & it's a bit easier to put back in, but don't be surprised if it doesn't sit back onto the bolts correctly, most of these older Sherco's have the tank just resting on the bottom bolt by now!!! ;-)
A few of the more minor jobs included, moving the handlebars to a more vertical position to suit my height, moved the levers for the same reason. I've also replaced the cable ties used to hold the front mudguard on with some bolts & spacers to stop it rubbing onto the front tyre, I also had to trim off the damaged front edge of the mudguard where is had sagged onto the tyre & become ragged.
Air Filter: This has to be one of the easiest air filters I've ever fitted, remove the bolt holding the rear mudguard in place, lift it up, remove the tiny allen bolt that holds the sprung bar in place, lift both this & the filter out & repeat the lot in reverse. Literally 5 minutes job... fab!!
The airbox has been sealed to the exhaust, so it can't be removed & cleaned properly, I've been told this is usually done when the airbox is knackered so I'll get a replacement when I can. Meanwhile the air filter is fairly easy to change, just unbolt the tail unit, undo the allen key bolt, pull out the retaining spring & the air filter & replace the lot...
Jobs left to do are the leaking fork seals, the right one is weeping a little, so I'll either do both of them myself or pay someone to do them as they are a bit of a pain & I would need to buy the specific tool for this bike to complete the job.
I also need to replace the front wheel bearings as they have a slight wobble in them. They are on order & will be here this week, so that'll be another job ticked off on this shrinking list!
I just found this great little Promo film on YouTube of a 2010 Sherco being put through it's paces in Arizona... another few years & this'll be me!! ;-) yeah right says Lucy...
I'll update this page as I do some more to the bike... have fun all...
February 2015...
I've just fitted a Domino slow action throttle, some slightly wider bars & had a play with the carb settings on the bike as it's running lean at the moment. It only runs well when the choke is on, it cuts out without it... mmm..
The Slow Action Throttle is a black one, (the white one is the fast or normal one), apparently it has a slight delay on the twist action when it pulls the cable due to the slot for the cable being a little deeper... I'm intrigued to find out how it works in practice as the Sherco tends to rev out a lot, creating a few 'oh feck!' moments as I jump off the back of the thing & watch it loop!! Going to need to buy a rear mudguard soon too as this one has been broken in a couple of places now & I've yet to find all the bits!!
In the meantime a little bit of plastic welding will do until I can find a replacement...

Carb Stuff...
The Carburettor on this bike is the Dell Orto PHBL26 version, (Apparently there are two others with the latest models carrying the Keihan carbs, like the KTM's etc...). So this bike is a fairly typical two stroke with a kick start, ie it's a bit temperamental!! For the most part it starts second kick, but sometimes when it's hot it is a pig & just will not start, so then it's wait til it cools then it'll usually go first kick! ;-)
The two bits that are important in the photo above are the two screws, the left one is the GAS mix & the right one is the IDLE screw, the drain plug on the bottom of the float bowl is a 14mm spanner too.
When I looked at the GAS screw it was at about 3 and a half turns out from the stop, (Anti-clockwise is richer, Clockwise in leaner), as was the Idle screw, (Clockwise increases the idle speed, Anti-clockwise decreases the idle speed), so I'm going to play with it on the next ride to see if I can get the mix levels right then report back... The idling seems fine & it gets adjusted if it's damp or colder than normal, but the lean mix at the moment isn't great...
I've also attached a little bit of blue bale twine to the choke lever as it's a bit tight to get to it under the frame, it's not pretty but works really well...
31/12/2015 - Updated Carb stuff
The Sherco has traditionally run a bit lean, I've stripped it a few times and cleaned, added an inline filter and messed with the settings some. I've not ridden it for 3 months and so when I got it out to play this time it would only run with the choke on so I had the carb out again.
I ordered a new main jet, then changed that and the pilot jet, increasing the pilot jet size from 36 up to 38, as well as all the seals I could find and the air mixture screw as it was rusty. Whilst doing this I noticed that the fuel intake has a bolt on it, so thought I'd open it up and look inside... I found the cause of the lean problems straight away... there is a mesh filter inside the cover that was pretty full of crap. how old I have no idea, but now I've cleaned it and reassembled the carb. A replacement is £3.24

Success, the bike is now running much nicer, the tick over is about right and the air mix screw is now at 2 turns plus a 1/3rd. The bike started first time too. I left it out in the cold for a couple of hours, then started it again and hey presto, the same... great stuff... so now time to ride it on some trials ground and see how that goes.
I've looked around on the web & come across a page on the advrider forum, that has a load of links to PDF's for all kinds of jobs on the Sherco, so here is the link:
April 2016:
Five things have just cropped up on the bike recently...
1. The kick start has started to stay low when I kick start the bike, feels like the return spring has worn or broke, so a strip down is required... I found a really good description of the process on the Splat Shop. Sherco Kick Start Return Spring Fitting Guide.
Here is the LINK to my page when I did this job

2. Clutch master cylinder leaked again... so I've stripped down the internals of the master cylinder and replaced them, the clutch already feels stronger. One thing I have noticed is that the clutch doesn't completely release on this bike, it's always driving forwards, which is good some times and a bloody nuisance at other times, so as I now bleed the clutch from the slave cylinder end every time, I've found you can release loads of air upwards, (Squeeze the slave cylinder piston gently or you get covered in fluid!) once there is no air coming out at all, then seal the master cylinder with the slave cylinder piston squeezed up tightly, then remount the slave cylinder. This seems to force the slave cylinder piston to do a better job and the clutch now releases fully. One thing I have been told by the guys at Inch Perfect trials is that these older master cylinders become porous of the really corrosive brake fluid over time, so if this clutch still leaks I'll have to change the whole thing...
3. Head bearings have gone. These come in pairs and you can buy a ready made kit for about £40 with the All Balls bearing and seals. I've not attempted to change them as still waiting for the parts, so I'll try to remember to do a pictoral session on the how... The bars have a notchy feel to them at the moment and there is a very slight play in them backwards and forwards. It really affects how smoothly the bike turns which I find amazing as it's not that bad on a mountain bike! Details HERE
4. Front fork seals have gone as well... There is a build up of fluid and dirt on the fork stanchions every time I ride it now, also I release the air out of the fork legs after most rides and there seems to be more and more each time I do it, so I'm guessing the oil level is dropping steadily too!
Look at the PDF's below as there is a good write up for doing this. I've just completed it and it was fine to do. Details at the bottom of the page HERE
5. Rear Linkage Service and replace the bearings - As I was playing with the rest of the bike I noticed the rear shock moving a lot so have stripped it out and sorted it out. Details HERE
On the whole this bike is at a point where it needs a major service, so I've got in in the workshop and will strip out the forks, do a full rebuild on them and then replace the head bearings as I put them back together again. Oils, coolant and all the rest is looking needed too!
hey hey!
Manuals: Available at the Sherco Website & LewisPort USA website. Trials Central has it's own dedicated Sherco forum too & I've had some good replies to questions from there.
From the Sherco,com site, here are the PDF's...
Sherco Service Manual 2002
Sherco Ignition Timing Guide
Sherco Setup & Lubrication Guide
Sherco Water Pump Seal Replacement Manual
Sherco Wiring Harness Manual
Sherco Bike Assembly Manual
Sherco Carb Jetting Manual
Sherco Brake & Clutch Bleeding Manual
Sherco Fork Seal Replacement Manual
Sherco Top End Maintenance Manual
Sherco Fork Oil Change
Sherco Torque Settings
Sherco 3.2 Cam Chain Timing (2009)
Sherco Clutch Disc Replacement
Sherco 3.2 Starting Procedure - a quick vid of the how!!
General workshop PDF's from the same bit on the forum...
Engine Stops Running in Wet Conditions
Rim Band Replacement
Tubeless Tyre Changing Manual.
Cheapest EBAY Sherco Clutch holding tool
This is a really good thread about an ongoing full strip down and service of a 290 I found on ADV
I also found this great little image somewhere, just shows a little trials engine working... fab stuff!

Enjoy...
This bike is a Cumbrian bike from new, bought by a guy on a farm near Tebay from Birkett Motosport in Broughton in Furness. (They don't seem to stock Sherco's anymore it seems).
It was used by the first owner for a few years, then sold to the next door neighbour about 2 years ago, a young lad, who clearly just rode it & now we have it to play with...
Things it's needed since we picked it up are:
New chain & sprockets - The standard is 42/10, with a 520 102 link chain, so I'll stick with that for now, although I've read a little about the ratio's & it appears that you can use the following:
10/42 = 4.2:1
9/42 = 4.66:1
10/44 = 4.4:1
I've ordered the chain & sprockets from Ecosse MX who have an Ebay shop, they were £57.99 + £7.99 postage... not used either the company or these chain & sprockets before so we'll see how they go...
08/01/15: The new chain arrived today, so I've now fitted it. The front sprocket requires the plastic engine casing & the gear lever to be taken off to access the spring clip that holds it in place.
 |
| Before... |
 |
| After... |
Once all the parts & undercarriage had been cleaned I slid the new chain through the runners & laid it on the swingarm whilst I fitted the rear sprocket to the rear wheel hub. This has 4 bolts, which are allen bolts at the front with 13mm nuts on the back, I replaced the thread lock on as I refitted them & also put a thin layer of copperslip between the sprocket & the hub to protect the alloy from corrosion.
 |
| The old and the new!! |
 |
| oooh shiny blue alloy... ;-) |
Gear Oil: The Sherco's share the same problem as the Beta apparently, the plates stick together until the bike is warm & has been ridden a bit, (Apparently the best ways to clear them is to start the bike in neutral, let it run until it is properly warm, then whack it in 5th gear with the front wheel against a wall & the front brake on, this is the extreme method, if the bike is used regularly, then it's not such a problem & riding it whilst dabbing the back brake can also clear it.
We had a hilarious moment when we started the bike the first time here, it was in the workshop & just jumped forward, the clutch did nowt & the back wheel just kept spinning, so we chucked a rag in the chain to jam it up as neither of us could find the cut off switch!! Proper muppet moment... ;-)
Recommendations say use Light Gear Oil, either Putoline, Maxima or Rock Oil, (450cc 75w synthetic too), but to my thinking I have a feeling that the modern gear oils are too sticky for these boxes, so a mineral oil or Semi Synthetic Auto Transmission Fluid, (85w ATF), might reduce the sticky problem... time will tell, for now I've stuck to the standard recommendation in the manual when I changed the oil.
The drain plug is under the gear lever, so on the left side of the engine, the refill plug is just below the exhaust on the right side of the engine block, (See pics below). You have to remove the bash plate to get it to drain cleanly.
We used a small funnel & laid the Sherco on it's side to fill it up, 450cc/ml of oil. It's a tiny hole & fills slowly so also spits back quickly, have a rag nearby to mop it up!!
Bleed the Clutch: I'd bled the clutch when I first got the bike to try to sort what I thought at the time was the problem with the gears, since then I've found a few other things that it has turned out to be...
1. The cap on the master cylinder is plastic & was cracked, so I swapped it with the brake one to test it out, it worked fine at the time, but then the next time I started the bike, I had the same problem, no clutch... I traced it through today after finding the reservoir empty of fluid, puzzling, but obvious when I refilled it & checked the banjo bolt above the chain, it had no washer on it so was seeping a tiny bubble of fluid when you pulled the lever & drained the cylinder when it stood for a day or so.
Because there was a load of mud & grass trapped behind the chain guard, this soaked it up & left no visible trace of the leak. So cleaned the crap out, re-bled the line after adding two new copper washers to the banjo bolt. I'll leave it overnight now & check the reservoir again tomorrow.
New caps are coming for the master cylinders, (£14.99 from the Splat Shop), only the plastic ones, but at some point I'll pop on two blue Apico ones to ensure a better fit & a bit of bling to the bike!
Leaky Petrol Tank: The tank on these bikes is made from some kind of polythene. The problems with this stuff seems to be that
A: It expands when it interacts with petrol & all of the additives in it,
B: The petcock has 2 brass threads in it which can pull out if they are over tightened.
A lot of these type of bikes have aluminium tanks, which is a bit heavier but more robust, it also has a good setup for attaching the petcock securely to the tank. I can only guess that this was a design idea that ran for a few years & has now been ditched as the newer Sherco's have an ally tank.
NB: These tanks ran from 2002 - 2005, same shape - available at the Splatt Shop for around £165.
The lad who owned this before me had made some effort to seal the petcock with standard black silicone sealant, it worked for about a day, then totally pee'd fuel everywhere... not ideal... I made a bodge repair after cleaning all the silicone off the tank that Lucy's dad had suggested, basically inner tube rubber patches with petroleum jelly between them, it worked for two days then the fuel pee'd everywhere again...
So I took off the foam & inner tube version I'd made, cleaned the tank again & applied more inner tube patches, 3 layers, sandwiching layers of the gasket in between... It was a pain in the arse to put back on as you have to stretch the inner tube rubber over the bolts & the petcock filter, but it eventually went on... phew..
I left it in the van to set overnight in the cold winter air & shrink the tank ready to pop it back into the bike the next morning.
Before putting it all back together I tested it with a full tank of fuel, it didn't leak, so back into the bike it all went, being especially careful to not jar the petcock, not an easy task... 10 days later it hasn't leaked a drop of fuel, it'll get a proper test when I actually take the bike out to ride it next week, but fingers crossed this might be the solution?? Update: 31/12/2015 this repair is still holding!
Coolant: To change the coolant is a bit of a fiddly pig, the tank has to come off, then you take out the 4 wires that go into the coil before trying to loosen the radiator cap, which is tucked under the head stock very neatly. Once this is removed, then drain the radiator, (drain plug is on the right side of the engine, below the water pump, Silver bit on the right in the picture below)
 |
| Coolant drain plug is bottom nut on the water pump |
 |
| Correct order for the coil wires, White, Red, Green, Black |
Pop it all back together & tighten the radiator cap with a screwdriver against the vertical ridges. Leave the fuel tank empty & somewhere cold overnight & it's a bit easier to put back in, but don't be surprised if it doesn't sit back onto the bolts correctly, most of these older Sherco's have the tank just resting on the bottom bolt by now!!! ;-)
A few of the more minor jobs included, moving the handlebars to a more vertical position to suit my height, moved the levers for the same reason. I've also replaced the cable ties used to hold the front mudguard on with some bolts & spacers to stop it rubbing onto the front tyre, I also had to trim off the damaged front edge of the mudguard where is had sagged onto the tyre & become ragged.
 |
| Mudguard spacers & front fork seals |
 |
| Clutch master cylinder & the all important 'kill switch' |
The airbox has been sealed to the exhaust, so it can't be removed & cleaned properly, I've been told this is usually done when the airbox is knackered so I'll get a replacement when I can. Meanwhile the air filter is fairly easy to change, just unbolt the tail unit, undo the allen key bolt, pull out the retaining spring & the air filter & replace the lot...
 |
| Glued up airbox, is this a knackered one?? |
I also need to replace the front wheel bearings as they have a slight wobble in them. They are on order & will be here this week, so that'll be another job ticked off on this shrinking list!
I just found this great little Promo film on YouTube of a 2010 Sherco being put through it's paces in Arizona... another few years & this'll be me!! ;-) yeah right says Lucy...
I'll update this page as I do some more to the bike... have fun all...
February 2015...
I've just fitted a Domino slow action throttle, some slightly wider bars & had a play with the carb settings on the bike as it's running lean at the moment. It only runs well when the choke is on, it cuts out without it... mmm..
The Slow Action Throttle is a black one, (the white one is the fast or normal one), apparently it has a slight delay on the twist action when it pulls the cable due to the slot for the cable being a little deeper... I'm intrigued to find out how it works in practice as the Sherco tends to rev out a lot, creating a few 'oh feck!' moments as I jump off the back of the thing & watch it loop!! Going to need to buy a rear mudguard soon too as this one has been broken in a couple of places now & I've yet to find all the bits!!
In the meantime a little bit of plastic welding will do until I can find a replacement...
Carb Stuff...
The Carburettor on this bike is the Dell Orto PHBL26 version, (Apparently there are two others with the latest models carrying the Keihan carbs, like the KTM's etc...). So this bike is a fairly typical two stroke with a kick start, ie it's a bit temperamental!! For the most part it starts second kick, but sometimes when it's hot it is a pig & just will not start, so then it's wait til it cools then it'll usually go first kick! ;-)
 |
| Dell Orto PHBL 26 Carbs on the 2002 Sherco 290 |
When I looked at the GAS screw it was at about 3 and a half turns out from the stop, (Anti-clockwise is richer, Clockwise in leaner), as was the Idle screw, (Clockwise increases the idle speed, Anti-clockwise decreases the idle speed), so I'm going to play with it on the next ride to see if I can get the mix levels right then report back... The idling seems fine & it gets adjusted if it's damp or colder than normal, but the lean mix at the moment isn't great...
I've also attached a little bit of blue bale twine to the choke lever as it's a bit tight to get to it under the frame, it's not pretty but works really well...
31/12/2015 - Updated Carb stuff
The Sherco has traditionally run a bit lean, I've stripped it a few times and cleaned, added an inline filter and messed with the settings some. I've not ridden it for 3 months and so when I got it out to play this time it would only run with the choke on so I had the carb out again.
I ordered a new main jet, then changed that and the pilot jet, increasing the pilot jet size from 36 up to 38, as well as all the seals I could find and the air mixture screw as it was rusty. Whilst doing this I noticed that the fuel intake has a bolt on it, so thought I'd open it up and look inside... I found the cause of the lean problems straight away... there is a mesh filter inside the cover that was pretty full of crap. how old I have no idea, but now I've cleaned it and reassembled the carb. A replacement is £3.24
 |
| Internal Mesh Filter |
 |
| Fuel intake cover (10mm Spanner) |

Success, the bike is now running much nicer, the tick over is about right and the air mix screw is now at 2 turns plus a 1/3rd. The bike started first time too. I left it out in the cold for a couple of hours, then started it again and hey presto, the same... great stuff... so now time to ride it on some trials ground and see how that goes.
I've looked around on the web & come across a page on the advrider forum, that has a load of links to PDF's for all kinds of jobs on the Sherco, so here is the link:
April 2016:
Five things have just cropped up on the bike recently...
1. The kick start has started to stay low when I kick start the bike, feels like the return spring has worn or broke, so a strip down is required... I found a really good description of the process on the Splat Shop. Sherco Kick Start Return Spring Fitting Guide.
Here is the LINK to my page when I did this job

2. Clutch master cylinder leaked again... so I've stripped down the internals of the master cylinder and replaced them, the clutch already feels stronger. One thing I have noticed is that the clutch doesn't completely release on this bike, it's always driving forwards, which is good some times and a bloody nuisance at other times, so as I now bleed the clutch from the slave cylinder end every time, I've found you can release loads of air upwards, (Squeeze the slave cylinder piston gently or you get covered in fluid!) once there is no air coming out at all, then seal the master cylinder with the slave cylinder piston squeezed up tightly, then remount the slave cylinder. This seems to force the slave cylinder piston to do a better job and the clutch now releases fully. One thing I have been told by the guys at Inch Perfect trials is that these older master cylinders become porous of the really corrosive brake fluid over time, so if this clutch still leaks I'll have to change the whole thing...
3. Head bearings have gone. These come in pairs and you can buy a ready made kit for about £40 with the All Balls bearing and seals. I've not attempted to change them as still waiting for the parts, so I'll try to remember to do a pictoral session on the how... The bars have a notchy feel to them at the moment and there is a very slight play in them backwards and forwards. It really affects how smoothly the bike turns which I find amazing as it's not that bad on a mountain bike! Details HERE
4. Front fork seals have gone as well... There is a build up of fluid and dirt on the fork stanchions every time I ride it now, also I release the air out of the fork legs after most rides and there seems to be more and more each time I do it, so I'm guessing the oil level is dropping steadily too!
Look at the PDF's below as there is a good write up for doing this. I've just completed it and it was fine to do. Details at the bottom of the page HERE
5. Rear Linkage Service and replace the bearings - As I was playing with the rest of the bike I noticed the rear shock moving a lot so have stripped it out and sorted it out. Details HERE
On the whole this bike is at a point where it needs a major service, so I've got in in the workshop and will strip out the forks, do a full rebuild on them and then replace the head bearings as I put them back together again. Oils, coolant and all the rest is looking needed too!
hey hey!
Manuals: Available at the Sherco Website & LewisPort USA website. Trials Central has it's own dedicated Sherco forum too & I've had some good replies to questions from there.
From the Sherco,com site, here are the PDF's...
Sherco Service Manual 2002
Sherco Ignition Timing Guide
Sherco Setup & Lubrication Guide
Sherco Water Pump Seal Replacement Manual
Sherco Wiring Harness Manual
Sherco Bike Assembly Manual
Sherco Carb Jetting Manual
Sherco Brake & Clutch Bleeding Manual
Sherco Fork Seal Replacement Manual
Sherco Top End Maintenance Manual
Sherco Fork Oil Change
Sherco Torque Settings
Sherco 3.2 Cam Chain Timing (2009)
Sherco Clutch Disc Replacement
Sherco 3.2 Starting Procedure - a quick vid of the how!!
General workshop PDF's from the same bit on the forum...
Engine Stops Running in Wet Conditions
Rim Band Replacement
Tubeless Tyre Changing Manual.
Cheapest EBAY Sherco Clutch holding tool
This is a really good thread about an ongoing full strip down and service of a 290 I found on ADV
I also found this great little image somewhere, just shows a little trials engine working... fab stuff!
Enjoy...